ORA-12541: TNS no listener

So you have bumped on this error. You have started your database, you have started your listeners… successfully, but still the client is adamant that there is are “no listeners”.

All the website will ask you politely, just to “start your listeners”(lsnrctl start). You can ping the host machine but tnsping gives error. tnsnames.ora, listener.ora and sqlnet.ora are as perfect as they can get… but still “ORA-12541: TNS: no listener”. There is one precaution you need to do. The sequence of starting your database should be:
  • Start the database
  • And then start the listeners
Because listeners register with the database you have started. If you have not started the database, or started listeners before starting the database… listeners do not know which database to register with.

Hold on, you do not need to shutdown your database. If you have already started the database and then the listeners, then go to sqlplus and issue the command
 ALTER SYSTEM REGISTER
 
This should make your client listen to your database 🙂

How to install Oracle on openSuSE 11.3

Note: I am writing this for people who just want to install Oracle for personal use, for learning Oracle. This tutorial is not for installing Oracle for production systems or any critical use. The instructions are for 32 bit systems, it should be same for 64 bit systems but I am not sure. I am installing on openSuSe 11.3, but these steps can also work for 11.1 and 11.2, but again I am not sure 🙂

I will write down the instructions as a series of steps.
  • Step 1: Download Oracle from Oracle Website. This is a 32-bit install. For 64-bit systems download from here. You will need UserId for Oracle. You will also need to accept the license agreement. The downloaded file will be “linux_11gR1_database_1013.zip”.

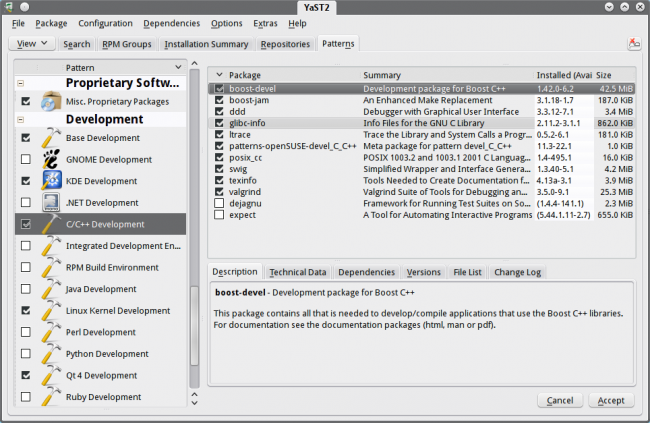
  • Step 2: Install “C/C++ Development” environment from Yast.

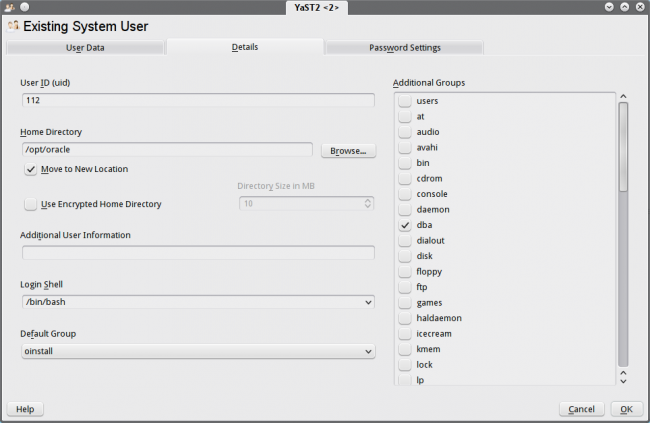
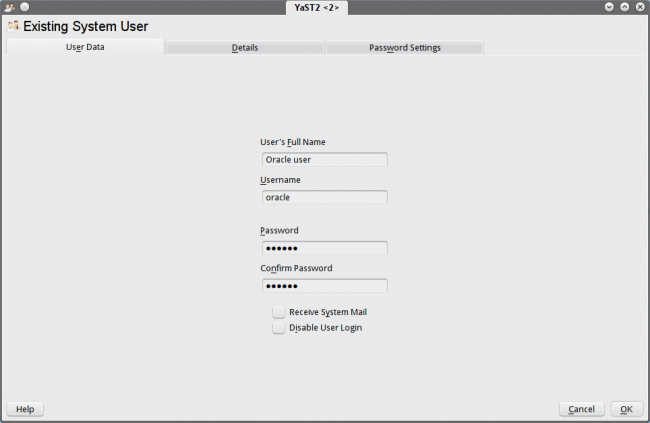
  • Step 3: Dwonload and install Orarun package. You will now get a User for Oracle. Open Yast(Adminsitration Settings), Select “Security and Users” tab and from there open “User Group Management”. On the resulting window set filter to “System Users”. From the list select “Oracle” and edit it. Set the password for user oracle on “User Data” tab. Go to “Deatils” tab and set the Login shell to “/bin/bash” (It will be /bin/false there). Save the changes and exit.
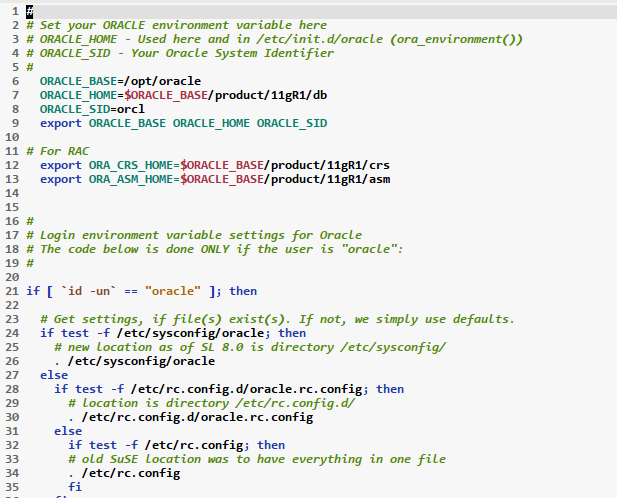
  • Step 4: Just some cosmetic changes, if needed. Open “/etc/profile.d/oracle.sh”. Check parameters ORACE_BASE, ORACLE_HOME, ORACLE_SID. You can change ORACLE_SID if you want it to be something different, by default it is “ORCL”. Modify the following parameters in “/etc/sysconfig/oracle”. [code lang=”perl”] AIO_MAX_SIZE=1048576 FILE_MAX_KERNEL=6815744 IP_LOCAL_PORT_RANGE="9000 65500" [/code] Modify the following parameters in /etc/init.d/oracle:
    test -f /proc/sys/fs/aio-max-nr && echo "  AIO_MAX_SIZE=${AIO_MAX_SIZE:-1048576}"
    test -f /proc/sys/fs/aio-max-nr && echo ${AIO_MAX_SIZE:-1048576} > /proc/sys/fs/aio-max-nr
    test -f /proc/sys/fs/aio-max-nr || echo
    You will need superuser priviliges for modifying these files.
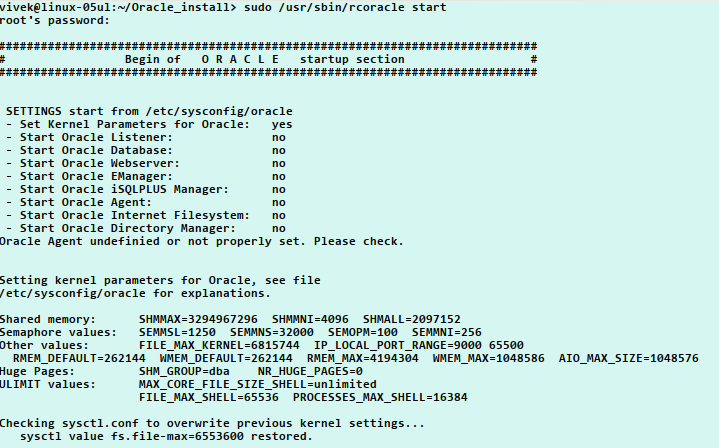
  • Step 5: Start Oracle server.
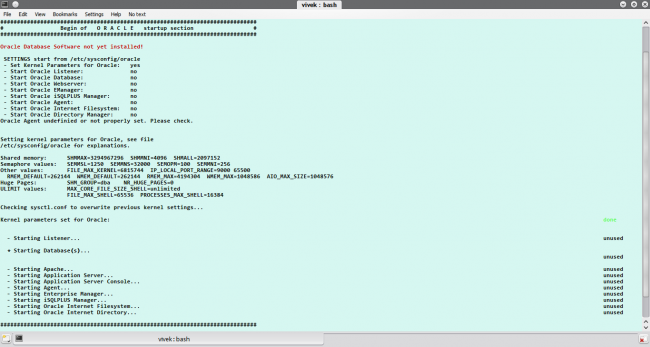
    sudo /usr/sbin/rcoracle start
    You will get a output like:
  • Step 6: Either logg off and log in as Oracle user. Or you can Switch to Oracle user (Application Launcher -> Leave -> Switch USer). Login user id is “oracle” and use the password you hav set in Step 2. After logging inCheck some details.

    no images were found

  • Step 7: Unzip the download oracle installation zip file ( Step 1).
    unzip linux_11gR1_database_1013.zip
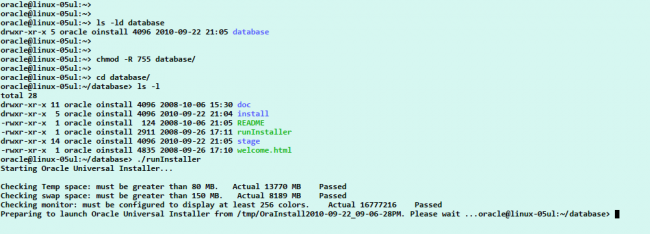
    You will now get a new directory “database”. Go to that directory and run “runInstaller” script. Before running set the execution permissions for whole database directory. Check the snapshot below:
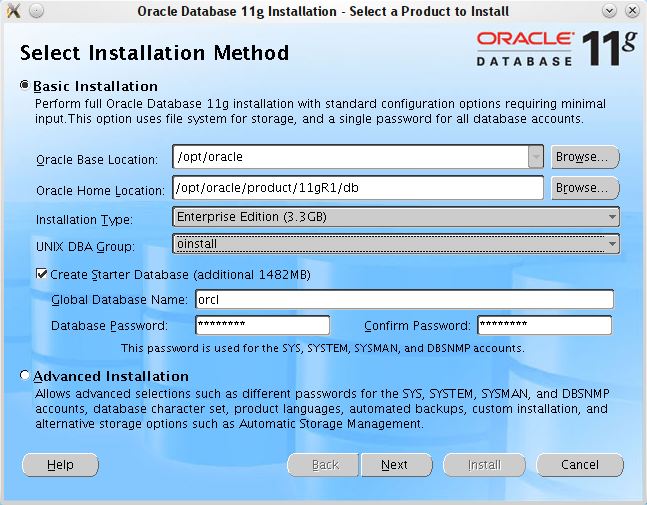
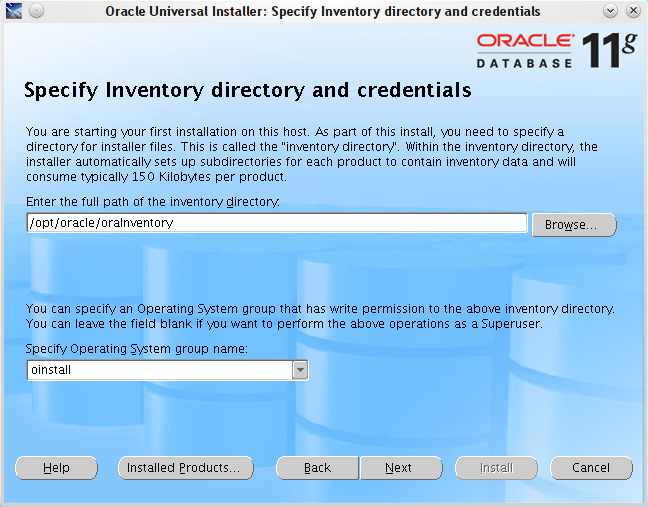
  • Step 8: Now the oracle installer will fire up. Tick the “Create Starter Database” checkbox if you want the example databses to be installed and enter the password of your choice and click Next button. You may get a warning that directory does not exist, click OK button and move forward. Next window will be to Specify inventory localtion. This should be
    /opt/oracle/oraInventory
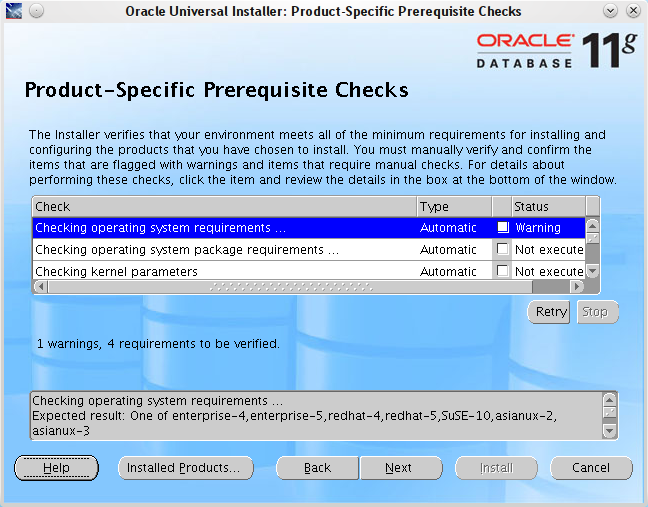
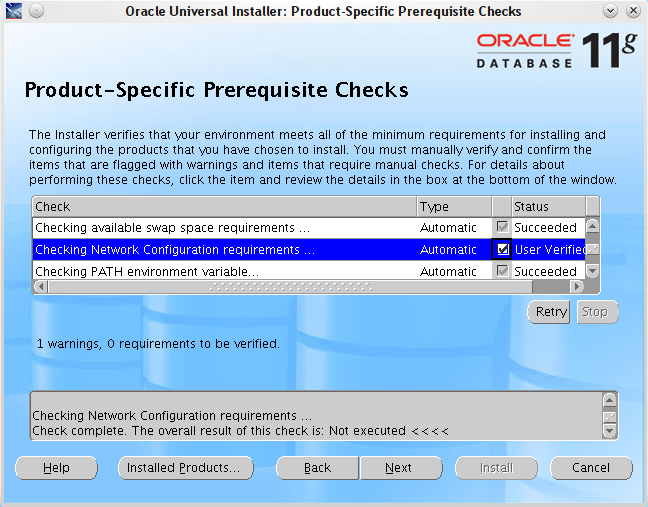
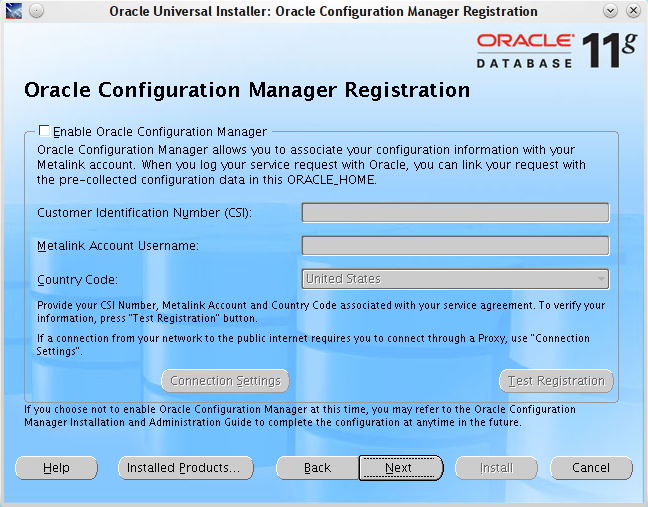
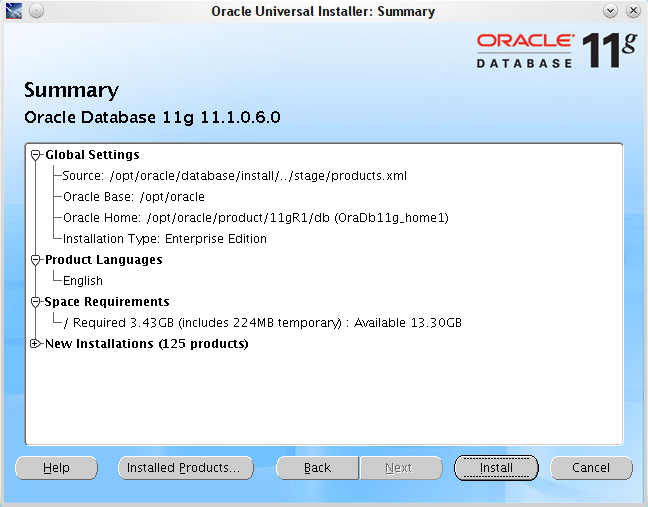
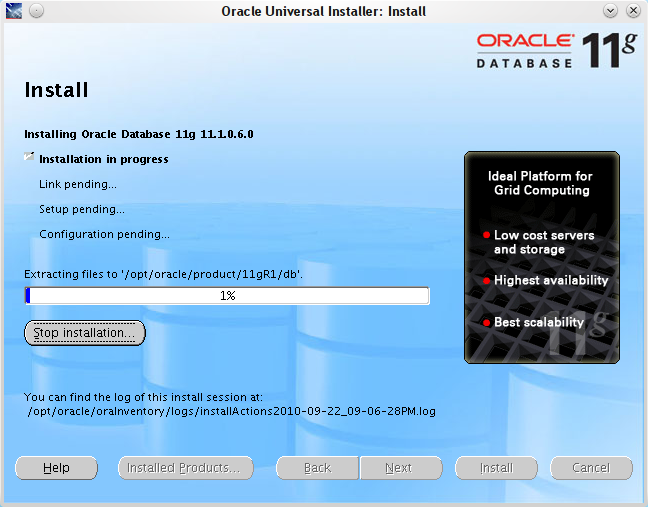
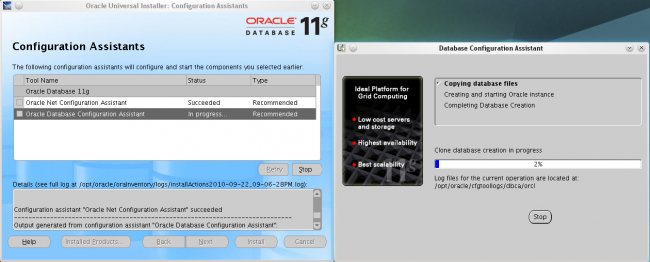
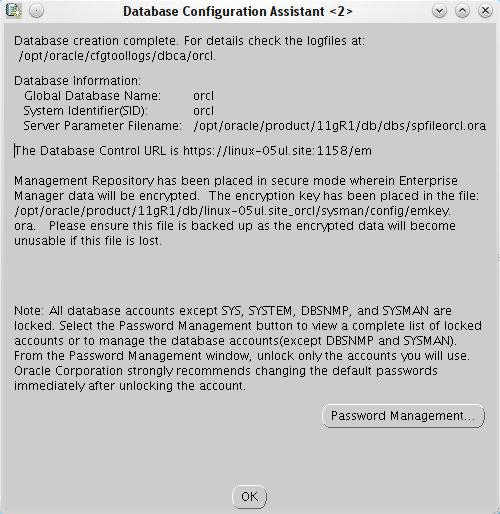
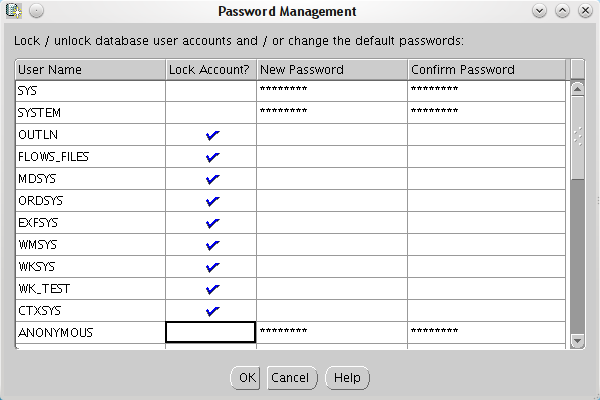
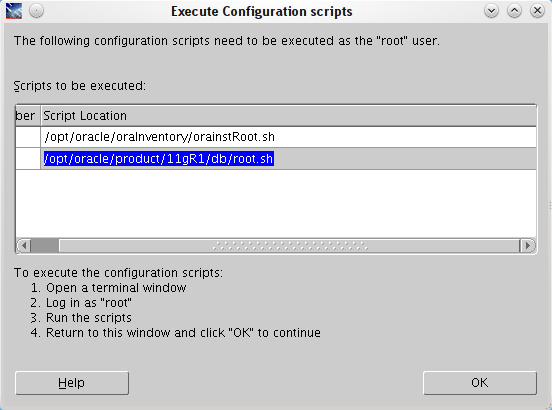
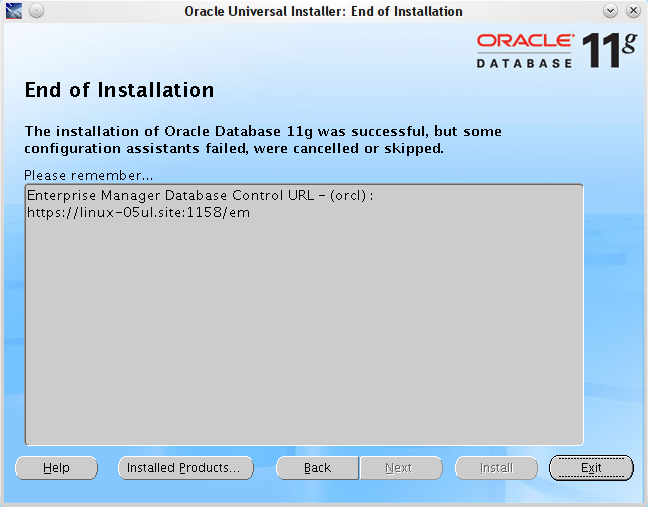
    You will get a warning, click YES there. The installer will check for pre-requisites and will throw some warnings and requirements. You need to manually tick those warnings and requirements. After that hit Next button and you will be taken to “Oracle Configuration Manager Registration”. You can skip this window by hitting Next button. Now will come the summary of software which will be installed. Verify and click Next. The installation will start. The installation process will take time so be patient. After installation will finish a window will pop up giving deatils of the installation. If you want to unlock accounts and set custom password you can do it by clicking on “Password Management” here. After finishing with this, oracle will display a window which will display scrips which you need to run as root. Run the scripts and the oracle installation finishes.
Now, whenever you want to start your oracle, First fire up konsole and start Oracle service
sudo /usr/sbin/oracle start

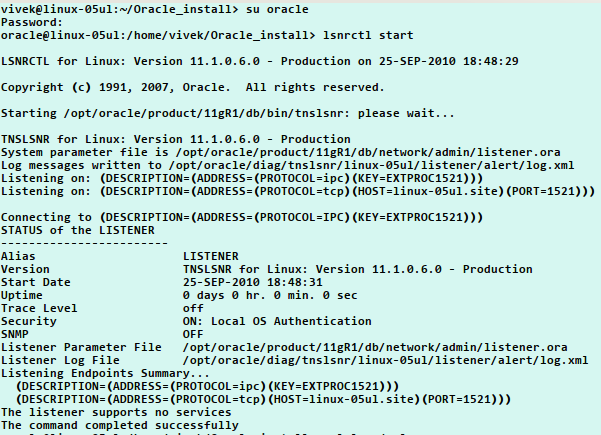
Then become oracle user (You do not need to login from GUI as you did in Step 6, but doing it from konsole will do). Start Oracle Listner.

lsnrctl start
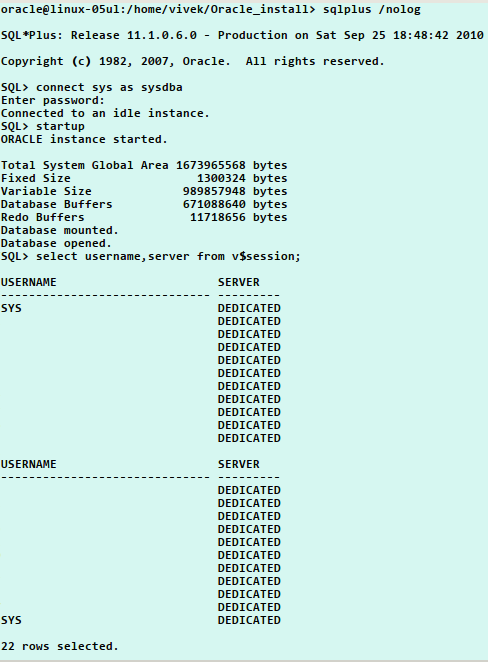
Now login to idle session of oracle and connect as sys and start the database.
sqlplus /nolog
Connect as sys user.
connect sys as sysdba
And start the Oracle database.
startup
Check the snapshots below:

Let me know if this post has helped you or if I have missed something.

My openSuSE 11.3 Setup

After experimenting with kernel and KDE version since the release of openSuSE 11.3, I decided to have a stable system till the next SuSE release, that is till openSuSE 11.4 is released. That means no KDE 4.5 as I do not want to change anything released in SuSE 11.3. Here are a few snapshots which I took after getting everything up and running… I am sure you are going to love it 🙂
Next I am planning to migrate to ext4 from ntfs completely, but that is going to take time.

VIM Part II – Basic Navigation and Editing

It has been a long time since I blogged about the how to get started with VIM. So without delay I should start with basic navigation and editing in VIM. Before that I just want to say that VIM is very case sensitive (in command mode). “A” is not same as “a”. So if I type “A” it means “A” and not “a”. There are a few different modes in VIM
  • Command Mode
  • Insert Mode
  • Search mode
When you start VIM, it will be in command mode. In command mode you can move cursor, delete text, search and replace text, navigate in the file. For inserting text you will have to use “insert” mode. You will not be able to insert text in command mode. Here are the keys for basic navigation: Move Right ==> l (Small L) Move Left ==> h (Small H) Move Up ==> k (Small K) Move Down ==> j (Small J) These shortcuts are for people who want to be as fast as fast possible while typing because you do not have to break the flow of your typing with the above navigations. For people who do not like this the normal Up, Down, Right and Left arrows on their keyboards will work as well :). For inserting the text you will have to press “i” (Small I) while in command mode. After hitting “i” you will no longer be in command mode and pressing “l”, “h”, “k” and “j” will actually print these letters. In insert mode you can type in the text as you do normally. To get out of “Insert” mode, press “Esc” key. Search mode is invoked by pressing “/” in command mode. After that type for whatever you want to and hit the Return key. Press “n” (Small N) to go to next searched item and “N” (Caps N) to go to previous search item. What makes VIM an editor of choice is its command mode and the way you can navigate within it without touching mouse. Here are some commands(which I know and use): gg ==> Go to first line in the document G ==> Go the last line nG ==> Go to line number “n”. 25G takes you to the 25th line in the document. c$ ==> Chage to the end of line cw ==> Change word dd ==> delete current line ndd ==> delete next n lines where n is any number yy ==> copy current line to buffer nyy ==> copy n lines to buffer P (small) ==> paste above the line where cursor is p (caps) ==> paste below the current line where cursor is o (small) ==> Add a new line below cursor position and invoke insert mode O (caps) ==> Add a new line above cursor position and invoke insert mode The “dd” puts the deleted lines in buffer so it can be also used as cut-paste in conjuction with “p” or “P” command.

VIM Part I – Get a basic VIM up and running

Recently, I “buzzed” that how much I love VIM. Then one friends thought of trying VIM. And by evening he had VIM un-installed from his system, terming it as an old tool in this age of bleeding edge GUI editors. This made me think that how many people dump VIM before even trying the features this editor has to give. So, here is my two cents to this editor.

I will try to write on how to setup this editor and then on we can go digging deeper. I use gvim on openSUSE 11.2 at home and on Windows XP at office. Barring a few different file names and file paths there is not much difference in the way gvim works in Linux and Windows. I will be specifying where ever and when ever required.

One thing, VIM is not an IDE, it is a simple (yet powerful) editor. It is not a replacement for Adobe Photoshop or anynthing like that. VIM is for people who like to “write down” their code. people who do not want to to take their hands off their keyboard. It is surely a blessing for LINUX/UNIX sys-admins. VIM is a VI like editor, VIM is VI Improved. And in addition to console editor, VIM also has a graphical front end GVIM, which brings the powe of VIM to the GUI. In all modern LINUX distros VIM is installed by default and you call only VIM when typing “vi” on the console, vi is aliased to vim. On windows you can download the EXE file from here. Download gvim72.exe. Direct link for gvim72.exe here. When installing on Windows, it will ask you for the kind of install, select “Full Install” there.

After installation the Windows user will get a batch file “gvim.bat” in C:\windows, it is this file which needs to be executed and not the gvim.exe found in C:\Program Files\Vim, that needs to be executed when we have to open gvim. But Windows users do not need to worry as whenever you type gvim in run command interface, it will always open gvim.bat. For Linux users, they can open gvim by typing in “gvim &” from the console (& will put the gvim in backgrouond in that console window), or type in gvim in Linux run command interface (Which can be opened by ALT+F2 in KDE). You will get a basic gvim running there.

This is it, installation is always the easiest way, it is the working with gvim which we have to learn. gvim is highly customizable editor, which you are going to know very soon. Gvim stores its settings in a file named “vimrc”. In windows the filename is “_vimrc” and it is located at C:\Program Files\vim. And, in Linux the filename is “.vimrc” and it is located at $HOME/.vim directory. If there is no vimrc file at these locations create them. If there is no “.vim” directory in $HOME, create it and then create a empty file “.vimrc” there.

For windows users there will be two directories in C:\Program Files\vim : vim72 and vimfiles. Whatever syntax changes, colorscheme changes any plugins that you add, they all need to be done in “vimfiles”i directory. And for “Linux” users it is the $HOME/.vim directory. This is to keep your customization safe when you are going to upgrade to future versions of VIM. e.g. VIM is going to release VIM 7.3, when you install that your vim72 directory will get irrelevant but you will not loose your customizations as the new vim installation will takje it from vimfiles folder, and in Linux it will be “.vim” directory. Other reason is that you can mess as much as you can with your vim, and if you screw it totally, you just need to empty vimfiles/.vim folder and everything will be fine again, then start again 🙂

So let’s make some basic changes in vimrc file and start editing… For winodws the changes need to be done in “_vimrc” and for Linux the changes need to be done in “.vimrc”.

Suppose you need to set you font to Lucida Console, 10 pt, Bold. To set your font
In Linux:


And in Windows:


Want to set a default colorscheme. Add this line to your vim:
Check the Vim color schemes sample here. Download your chosen colorscheme and put it in $HOME/.vim/colors (Unix) or C:\Program Files\Vim\vimfiles\colors (Windows) folder.

I am putitng my vimrc file here just for refrence. The comments in it explain what the commands do.

Note: ” in vimrc is for putting comment.
source $VIMRUNTIME/vimrc_example.vim
"I am a Cobol Developer :)
autocmd FileType cobol set sw=4 sts=4 et sta tw=7
set nocompatible
"Behave like Microsoft.. CTRL+P, CTRL+P stuff
source $VIMRUNTIME/mswin.vim
behave mswin
set nu "Display line numbers
set ignorecase
set smartcase
set nobackup
set nowrap
"Set file formats to Unix, the other options
"are ff=dos or ff=mac. If you open a file from 
"Windows while your gvim ff=unix, you will see 
"^M characters. These ^M characters are Windows 
"End of Line characters
set fileformats=unix
set guioptions=agimrLt;
"The following commands will indent your code the right amount, 
"using spaces rather than tabs and automatically indent after you 
"start.>>> 
set expandtab
set tabstop=2
set shiftwidth=2
set autoindent
set smartindent
"<<< Complete indentation code
set autochdir
"Whenever I open or creat a file with extension pco, cpy or
"link, set its filetype to cobol, which will evoke proper
"syntax highlighting
au BufNewFile,BufRead *.pco set filetype=cobol
au BufNewFile,BufRead *.cpy set filetype=cobol
au BufNewFile,BufRead *.link set filetype=cobol
set diffexpr=MyDiff()
let cobol_legacy_code=1
let $p_h='/home/vivek/public_html'
set gfn=Consolas\ Bold\ 10
colorscheme ps_color
set cursorline
" Press Space to turn off highlighting and clear any message already displayed.
nnoremap   :nohlsearch:echo

"Tab navigation like firefox
nmap  :tabnext
nmap  :tabprevious
map  :tabprevious
map  :tabnext
imap  :tabpreviousi
imap  :tabnexti
nmap  :tabnew
imap  :tabnew
"Key map to copy the selected word and search it... Key Map: CTRL+F
map  /
imap  /
nmap  /
"Go Directly to Procedure Division in COBOL...
nmap  /PROCEDURE
imap  /PROCEDURE
"CTRL+Z --> Undo
imap  :u
nmap  :u
map  :u
"CTRL+O --> Open a new tab and also open a window to browse 
nmap  :tabnew\|browse e
imap  :tabnew\|browse e
"CTRL+W --> Selects word
nmap  bvw
imap  bvw
":%s#\s*\r\?$##
"ATL+M --> Trim trailing spaces
nnoremap  :%s#\s*\r\?$##
inoremap  :%s#\s*\r\?$##
noremap   :%s#\s*\r\?$##
"CTRL+Down Arrow --> Scroll page down
nnoremap  
inoremap  
noremap  
"CTRL+Up Arrow --> Scroll page up
nnoremap  
inoremap  
noremap  
"CTRL+F1 --> Toggle Shortcuts Bar 
nnoremap  :if &go=~#'T'set go-=Telseset go+=Tendif


This is just for getting a basic Vim running on your machine. Next I will write down how to do real work in Vim.
Let me know if I missing something in this post.
1 2 3 4 5